Thursday, December 26, 2013
Saturday, December 21, 2013
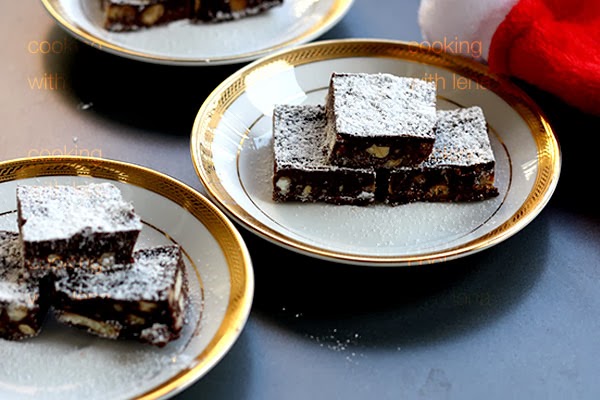
ROCKY ROAD SQUARES
How to make the best Rocky Road Squares ?
Cooking Time : 5 minutes
Preparation Time : 10 minutes
Makes : 24 Squares
Ingredients :
Butter : 113 g / 4 oz / 1/2 Cup, at room temperature
Good quality dark chocolate (minimum 60% cocoa solids) : 113 g / 4 oz / 3/4 Cup, broken into pieces*
Good Quality Semi sweet Chocolate : 113 g / 4 oz / 3/4 Cup, broken into pieces*
Almonds / pecans / walnuts : 85g / 3oz / 1/2 Cup, unsalted, Roasted
Honey : 3tbsp
Honey : 3tbsp
Rich Tea biscuits : 125g, (i used homemade Chocolate chip cookies)
Marshmallows : 100g, (13 large maeshmallows)
Icing sugar / Powdered Sugar for dusting : 1tsp
1. Instead of chocolate bar , You can use Chocolate chips that are used for melting.
2. I used Mini marshmallows for this recipe. If you have large marshmallows, cut each into 6 pieces and use as mentioned.
1. Crush together almonds and biscuits. Best way is to transfer Almonds and biscuits into a zip-lock bag / freezer bag and then bash them with a rolling pin. It can be of any size, shape or crumbs. (If you are using a mixer grinder, make sure that you are not making fine powder of it)
2. In a heavy bottom vessel, add butter, chocolate and honey. Heat in the slowest flame and stir continuously. (Make sure, it is a heavy bottom vessel, else chocolate mixture will stick to the bottom and burn). When the chocolate is completely melted, combine the mixture well and scoop out 1/4 cup of this melted mixture and keep aside.
3. Fold the Almond and biscuit mixture into the melted chocolate mixture in the saucepan, and then add the marshmallows. Stir well for a minute and turn off the flame.
4. Tip into a foil tray (24cm square) or a rectangle pan covered with foil and level it with a spatula. Add the chocolate mixture we kept aside on top of this and level again. Refrigerate for 4hours or overnight.
Tuesday, December 17, 2013
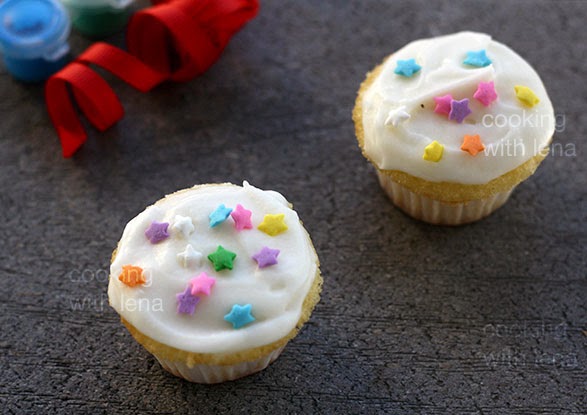
Classic Vanilla Cupcakes - Christmas Special
The best and easy recipe for Vanilla cupcakes with butter cream frosting
How to make Vanilla Muffin?
Preparation time : 20 minutes
Cooking Time : 18 minutes
Yield : 28 mini muffins or 14 standard muffins
Ingredients :
Unsalted Butter : one stick / 113 g, At Room temperature*
Sugar : 115 g
All Purpose Flour (maida) : 150 g
Eggs : 2, At room Temperature*
Baking Powder : 1 1/2 tsp
Vanilla Extract : 1 tsp
Salt : 1/8 tsp (a pinch)
Milk : 2 tbsp, at room temperature*
Note : Ingredients that are marked with ' * ', should be at room temperature. Otherwise Top side of muffins turns to sticky when it cools down.
Method :
1. Preheat oven to 350 degrees F (177 degrees C) and line muffin pan with paper liners.
2. Sift together the flour, salt and baking powder.
3. With an electric mixer, beat the butter and sugar together until blended. Add the egg one by one and continue beating until the mixture is creamy.
4. Fold the flour mixture into the egg mixture. Combine well with a wooden spatula.
5. Now add Vanilla extract and milk. Scrape down the sides of the bowl as needed. (Do not Over mix the batter)
6. Scoop the batter into muffin cups almost 3/4th of it and bake for 14 minutes for mini muffins and 17 minutes for standard muffins. Always check a few minutes before the stated baking time. (Do not over bake as it makes the muffin dry.) Remove from oven and place on a wire rack to cool. Once the cupcakes have completely cooled, frost with icing.
Recipe for Butter cream Frosting :
Unsalted Butter : 80 gm or 1/3 cup
Icing Sugar : 1 1/2 Cup, sifted
Milk : 1 1/2 tbsp
Vanilla extract : 3/4 tsp
Method :
Using an electric mixer, or with a hand mixer, cream the butter until smooth and well blended. Gradually beat the Icing sugar on low speed. Scrape down the sides of the bowl. Add the vanilla extract. Add the milk and beat on high speed for 3 minutes until frosting is light and smooth.
Tuesday, December 3, 2013
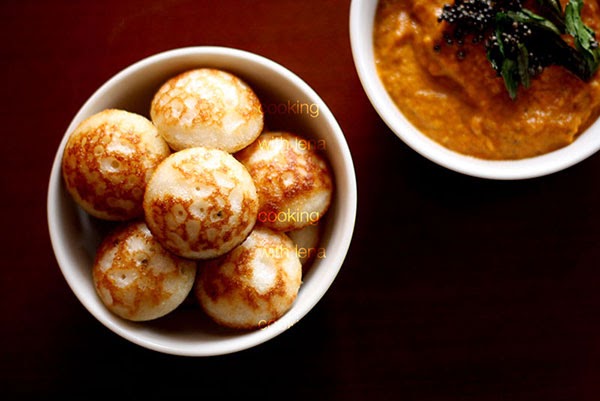
CHETTINADU KUZHI PANIYARAM
If you are bored of regular idli and dosa, you should definitely try this Chettinadu Kuzhi Paniyaram with the same Iddli/Dosa batter. Paniyaram can be served as a Breakfast or as evening snack. It goes well with Tomato Chutney / Coconut Chutney.
How to make the Best Chettinadu Kuzhi Paniyaram?
Preparation Time : 15 minutes
Serves : 3 Adults
Ingredients :
Iddli /Dosa Batter : 2Cups
Onion : 1/2, finely chopped
Green Chilly : 1, finely chopped
Mustard Seeds : 1/2tsp
Curry Leaves : 1spring, finely chopped
Halved urad dal/split black gram/uzhunnu parippu : 1/2tsp
Hing/asafoetida Powder/kaayam : a pinch
Shredded coconut : 1/2tbsp (optional)
Oil : 2-3tbsp(i used coconut oil)
Note :
You can add 2tbsp grated carrots along with shredded coconut to make the paniyaram more healthy.
Method :
1. Heat 1/2tbsp oil in a thadka pan and add mustard seeds. When it splutters, add urad daal followed by onion and green chillies. When onion turns to translucent, add shredded coconut and saute well. Add salt, curry leaves and asafoetida powder. Turn off the flame and add this to thick iddli/Dosa batter. Mix well and adjust the salt.
2. Heat a paniyaram pan / unniyappam pan and add 3-4drops of oil into each moulds. (non-stick pan works the best). Now Pour the 1tbsp of batter into each moulds and cover the pan with a lid. When it starts to turn slight brown on the edges, turn them with a pair of forks and cook uncovered. You can insert a toothpick in the mddle of paniyaram to check whether its done. Now transfer it to a kitchen towel.
3. Serve hot with coconut chutney / Tomato chutney.
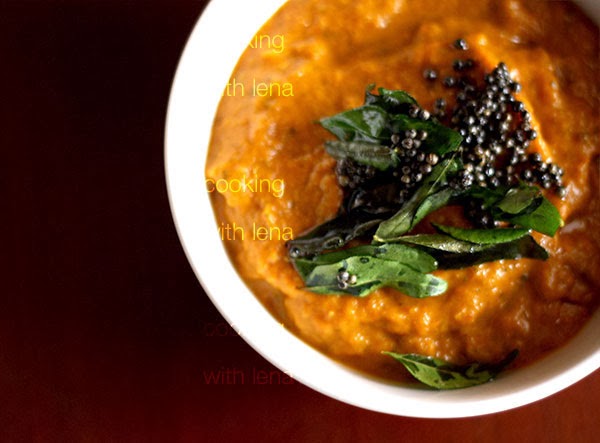
Recipe for the best Tomato Chutney :
Preparation Time : 15minutes
Serves : 3
Ingredients :
Onion : 1, chopped
Tomato : 3, chopped
Chilly powder : 3/4tsp
Turmeric powder : 1/4tsp
Coriander leaves : 2tbsp, finely chopped
Salt
Mustard Seeds : 1/4tsp
Curry leaves : 1spring
Oil : 1tsp + 1tsp
Method :
Heat 1tsp oil in a pan and saute onion till translucent. Now add turmeric powder and chilly powder. Saute well till you get a nice aroma and then add tomatoes. Mix well and cover with a tight lid. Cook till tomatoes are soft. Add salt and coriander leaves and combine well. Turn off the flame and allow it to cool. Grind it to a smooth paste by adding enough water to make a thick tomato chutney. Now heat remaining oil in a tadka pan and add mustard seeds. When it splutters, add curry leaves and turn off the flame. Add tadka to the tomato chutney and enjoy with chettinad kuzhi paniyaram.
Wednesday, November 27, 2013
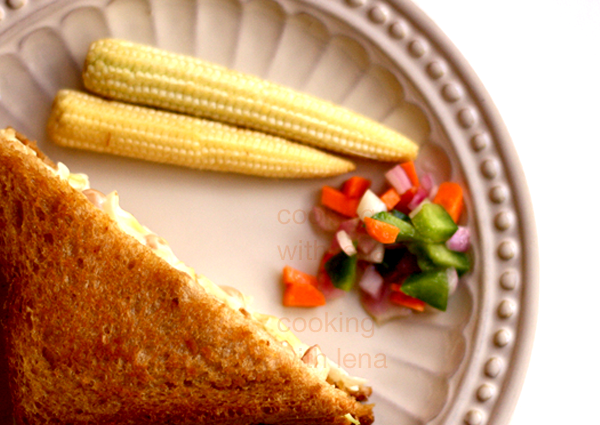
COLESLAW AND SOAKED PEANUT SANDWICH
Looking for a new breakfast? Coleslaw and soaked peanut sandwich is a good combination of raw and crunchy vegetables like cabbage, carrot with soaked peanuts and creamy homemade mayonnaise.
The protein content in raw peanuts is higher than any other nuts and legumes. Protein acts as the key essential nutrient for building, repairing and maintaining healthy muscle fiber. Peanuts contain high amounts of unsaturated or healthy fats, which has the ability to decrease bad and increase good cholesterol levels. Unsaturated fats also provide you with a key nutrient that helps with the fat burning process. Raw peanuts provide you with more fiber than peanut butter or other peanut varieties. Fiber guides in digestion and helps with the metabolism process as well.
How to make the best Coleslaw and soaked peanut sandwich?
Preparation time : 15minutes
Serves : 3
Ingredients :
Cabbage : 1/4Cup, finely chopped
Carrots : 1/4Cup, finely chopped
Raw Peanuts : 1/4Cup
Mayonnaise : 1/4Cup
Pepper Powder
Salt
Method :
Soak raw peanuts in water for 25-30 minutes. Combine remaining ingredients in a bowl and add drained peanuts. Our Coleslaw and peanut filling is ready. Now Toast the bread on a tawa / toaster and add 1 scoop of filling in the middle. spread neatly and cover with the other slice. Cut and serve your Coleslaw and soaked peanut salad and refrigerate remaining filling.
Saturday, November 16, 2013
BROCCOLI AND ALMOND SALAD
Broccoli is considered to be one of the most nutritious vegetables that can offer numerous health benefits. Studies have shown that compounds in broccoli can protect from prostate, colon, urinary bladder, pancreatic, and breast cancers. When you buy broccoli, the heads should have tightly clustered florets that are deep green, with no yellow spots and use it within 2 days.
Recipe for Broccoli and Almond Salad
Preparation time : 10 minutes
Serves 2
Ingredients :
Broccoli : 1,small, blanched(instructions given below)
Cherry Tomatoes : 5
Almonds : 10
Onion : 1tsp, sliced / chopped
English Cucumber : 1, cut into bite size
English Cucumber : 1, cut into bite size
Romaine Lettuce : 1Cup
Ingredients for yogurt dressing :
Greek Yogurt / Hung curd : 2tbsp
Salt : a Pinch
Olive Oil : 1tsp
Mix all ingredients with a spoon till you get a smooth yogurt dressing.
How to make Broccoli and almond salad?
Take a salad bowl and place almonds, cucumber, halved cherry tomatoes, lettuce, onions, blanched / steamed broccoli and mix lightly together. You can keep this in refrigerate for hours and just before serving add the dressing on top and toss slightly. (it can be eaten without any dressing too)
Preparation of broccoli :
Trim Off the Floret and make bite sized pieces. Wash under running water and keep aside. Main stem of broccoli is entirely edible. Remove the hard top layer of stem with a peeler or knife/ Now trim and Slice the Stem. Stem takes more cooking time compared to florets. So cut into smaller pieces (1/2 -3/4 inch length). Rinse stem slices under running water and keep aside to blanch / microwave.(i microwaved them as it was easy :)
Cooking method #1 : How to blanch a broccoli?
Take a bowl of ice water and keep it next to the stove. Bring a large pot of water to a rapid boil. Now add enough salt. Add the stem and broccoli florets. Cook for 1 1/2 minutes until crisp and tender. Now take it out from hot water and plunge immediately in the ice water.
Cooking Method #2: How to steam a broccoli in the Microwave?
Take a microwave safe ceramic / glass bowl and place the broccoli stems first and then florets. Now take 2-3 tablespoons of water with enough salt and sprinkle over top. Cover with a ceramic / glass plate and microwave for 3 minutes. Remove the lid carefully and check if the broccoli is tender. Click here for the pictorial details for microwaving broccoli.
Saturday, November 9, 2013
UZHUNNU VADA / Medhu vadai
A popular south-indian tea-time snack made with a thick batter urad daal(uzhunnu parippu) and raw rice(pachari) .
Cooking time : 10minutes
Makes : 10 -12
Ingredients :
Urad Dal / Uzhunnu parippu : 1Cup
Ginger : 1/2 Inch Piece, finely chopped
Green Chillies : 2, finely chopped
Shallots : 4, finely chopped
Pepper Corns : 1/4tsp(Crushed)
Curry leaves : 1spring, finely chopped
Baking soda (to make the vada soft) : 1/4tsp (optional)
Salt to taste
OIl for deep frying
How to make a perfectly shaped Uzhunnu vada / Medhu Vadai?
1. Clean and soak urad daal for 2hours. Now drain completely and grind it to a smooth paste without adding water. (if you are using mixer grinder / blender, sprinkle water and grind it. but if you are using more water the consistency of batter changes and you cant make the shape)
2. To the batter, add remaining ingredients except oil and combine well.
3. Heat a kadai on medium flame and add oil. In a bowl, keep some cold water near to the batter.
4. Wet your palm in cold water and immediately take a small portion of batter. Slowly shake your hand in clockwise direction and you can see the batter turning into a ball. Now take it near to the kadai and press in the middle to make hole and drop it immediately to the oil.
5. Repeat step4 from beginning and fry all till golden brown and drain on paper towels.
6. Serve hot with coconut chutney.
Notes to make perfect uzhunnu vada in perfect shape :
1. You should not soak urad daal / uzhunnu parippu for more than 2 1/2 hours, as it will cause to absorb more oil when you fry uzhunnu vada.
2. If the consistency of batter is thin, you can add rice powder (maximum 1tbsp) and make it thick. But it will make your vada hard. So use small amount of water to make the batter.
Tuesday, November 5, 2013
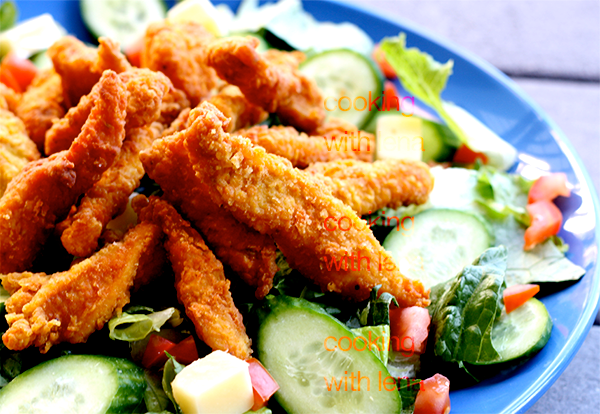
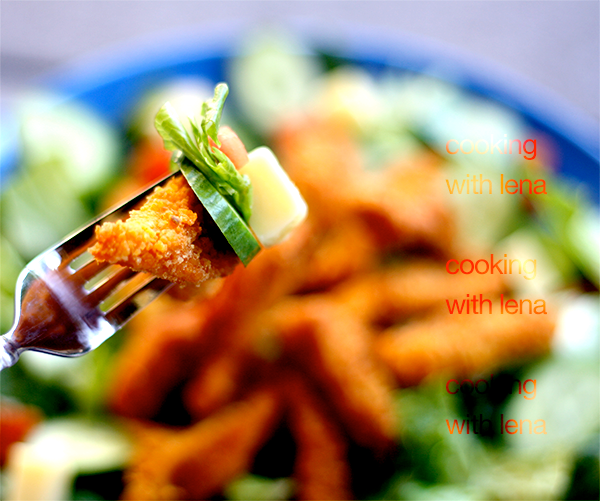
CRISPY CHICKEN SALAD / Homemade version of KFC chicken fingers
A healthy take on KFC chicken fingers by adding crunchy vegetables and homemade mayonnaise.
How to make Crispy Chicken Salad / Main course Chicken Salad?
Cooking Time : 5min
Cooking Time : 5min
Preparation Time : 20min
Serves : 2
Serves : 2
Ingredients for Crispy chicken Salad :
Chicken breast : 1, (approx : 140g), cut into thin strips, pat dried
Maida : 1/4Cup
Bread crumbs : 1/4 Cup (toast 3 bread slices and when it cools, crush in mixer) ++
Egg : 1,slightly beaten with 1tsp milk
White Pepper Powder : 1/4tsp
Natural Vinegar / Lemon juice: 1tsp
Garlic Paste / Garlic Powder : 1/2tsp
Salt
Oil to deep fry
Cherry tomatoes : 4, halved / half of a normal tomato , finely chopped
English cucumber : 1, thinly sliced
string cheese : 1, cubed , optional
Romaine Lettuce : 1/2Cup
Salad Dressing / Mayonnaise : 2tbsp, i used my homemade mayonnaise (you can use any salad dressing)
Method for making crunchy / crispy chicken strips :
1. In a bowl mix together lemon juice / vinegar, garlic powder, pepper powder and salt. Now add pat dried chicken strips and marinate for 15 minutes in refrigerator.
2. Spread maida in a wide plate and add chicken strips. Mix well to coat thoroughly. Now for the second coating, take each chicken strips and dip them in the egg and milk batter and immediately transfer to the plate with bread crumbs. Coat well and repeat the same with remaing chicken strips
3. Deep fry and transfer them to a paper towel.
Arranging the salad :
First arrange romaine in a wide plate. Now add chopped tomatoes, cucumber and string cheese. Neatly add chicken strips in the middle and serve with a salad dressing of your choice or my homemade mayonnaise.
Notes :1. you can make chicken nuggets / chicken drumsticks in the same way. 2. you can add your favorite vegetables for the salad
Sunday, October 20, 2013
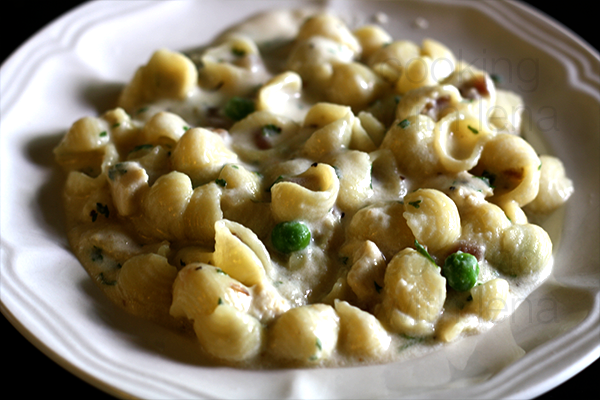
CREAMY CHICKEN PASTA MINI SHELLS / Pasta with White Sauce
How to make Creamy Chicken Pasta / Pasta with White sauce?
Cooking Time : 30min
Serves : 2
Ingredients for creamy chicken pasta :
Mini shell pasta : 2 Cups(or any small cut pasta)
Chicken breast : 1, (approx : 140g), chopped into small pieces
Fresh Grean peas : 1/2Cup (or finely chopped carrot : 1)
Maida : 2tbsp
Butter : 2tbsp
Milk : 2 1/2Cups(should not be cold milk, either warm or ar room temperature)
Butter : 2tbsp
Milk : 2 1/2Cups(should not be cold milk, either warm or ar room temperature)
Dried / Fresh Parsley : 2tsp
Bay leaf : 1
Onion : 1, small, finely chopped
Garlic : 2, finely chopped
Salt
Extra virgin Olive Oil : 1tbsp
Freshly grated sharp cheddar cheese / parmersan cheese : 1/4Cup / 1oz / 25g(i didn't add)
Big pinch of black pepper
Extra virgin Olive Oil : 1tbsp
Freshly grated sharp cheddar cheese / parmersan cheese : 1/4Cup / 1oz / 25g(i didn't add)
Big pinch of black pepper
Boil water in a large pan and add salt.(should not add oil as we do for noodles. if you are adding oil , pasta wont stick to the sauce). Add pasta to the boiling water until al dente, and add cold water to the pan to stop cooking the pasta. Now drain and hold the pan under running water for a minute. drain and set aside.
Recipe for creamy chicken sauce :
1. Saute fresh minced garlic in extra virgin olive oil along with onion and bay leaf. When onion is translucent, add butter. Now add flour and Stir continuously (medium heat) until flour turns to light brown.
2. Remove from heat and gradually add milk, stir continuously as it will not form lumps.
3. Put the sauce pan back on fire and add chicken and fresh peas. cook till the meat is cooked and white sauce starts to thick. Add parsley, pepper powder, cheese(optional) and adjust salt.
4. Add Cooked pasta to the sauce and toss gently.
Monday, September 30, 2013
CREAM OF FRESH GREEN PEA SOUP
Recipe for Fresh Green Pea Soup / Cream of Green pea soup
Serves : 4
Cooking Time : 15 minutes
Ingredients :
Fresh Green Peas : 1Cup
Onion : 1, finely chopped
Onion : 1, finely chopped
Milk : 1Cup
Butter : 2tbsp
Maida : 3tbsp
Bay leaf : 1
Dried / Fresh Parsley : 1/2tsp
Water / vegetable stock / chicken stock : 2 1/2Cups
Fresh cream : 2tbsp (optional)
Method :
Fresh cream : 2tbsp (optional)
1. Clean and wash Green Peas. Heat 2 1/2 cups of water and add green peas. Cook for 5 minutes and turn off before it changes color. drain the water to a bowl and keep aside to add in soup. Soon after draining, pour cold water on top of the peas to retain the bright color of peas.
2. When it cools, put it in a blender and make a smooth paste.
2. When it cools, put it in a blender and make a smooth paste.
2. Melt butter in sauce pan over Medium heat. Add bay leaf, onion, Parsely and Saute till onion turns to translucent.
3. Now add the maida and saute till it changes its color slightly, 4-5minutes. Cooking till this time will reduce the strong 'flour flavor'.
4.. Now turn into low flame and add milk slowly with constant stirring. Add water in which we boiled the peas along with pea puree and Continue cooking in low flame till you get a creamy green pea soup.
5. Add salt and black pepper powder to taste. Serve hot.
Thursday, August 22, 2013
SOYA CHUNKS Biriyani / Pressure cooker Soya chunks Pulao
Serves : 4
Cooking Time : 30 minutes
Ingredients :
Basmati Rice : 1 1/2Cup, washed and drainedSoya Chunks : 100g
Onion : 2, thinly Sliced
Tomato : 1, chopped finely
Green chillies :3
Ginger :1 inch piece
Garlic : 6cloves
Mint leaves :10
Coriander leaves : 1bunch
Chilli powder : 1tsp
Bay leaf :1
Ghee :1tbsp
Coconut Oil : 1tbsp
Lemon Juice :1tsp
Salt
Coconut milk : 1Cup
For the Biriyani Masala :
Coriander seeds :1tbspCumin seeds :1tsp
Black peppercorns :1tsp
Cardamom : 3 pods
Cloves : 3
Cinnamon :1inch stick
How to make Soya chunks biriyani in pressure cooker ?
1. Dry roast all ingredients for biriyani masala on a skillet and grind it to a fine powder after it cools.
2. Soak soya chunks in water for 20 minutes. Now wash it well under running water and squeeze well. Boil water in a kadai and add cleaned soya chunks. Turn off the flame and close with a tight lid. after 10 minutes, drain the water and squeeze water out of it.
3. Make a paste of ginger, garlic, green chilli, mint leaves and half of the coriander leaves. Heat Ghee and coconut oil in a pressure cooker and add the ginger+ garlic+mint+chilli+coriander paste to the oil and cook till you get a nice aroma. Now add onion and cook till they turn to golden brown in color. Add tomato and saute well over medium flame.
4. Add the dry roasted biriyani masala and chilli powder and stir in for 2minutes. Now add the soya chunks and basmati rice and combine well with the masala. Add salt and Cook for 3minutes.
5. Now add coconut milk, 2 1/4 Cups of water and lemon juice. Cover the pressure cooker with a lid and cook till done.(i cooked for 1whistle and kept for 5minutes before opening the cooker).
6. Garnish with the rest of coriander leaves and serve hot with raitha.
Saturday, August 3, 2013
NARANGA ACHAR / Lemon Pickle
Indulge your taste buds and do justice to your heart with this delicious Lemon Pickle in Extra Virgin Olive oil
Ingredients:
Lemon/ Key Lime : 300g, 10medium size / 18small / 5 which we get in U.S, clean and pat dry
Ginger : 1 inch, julienned
Garlic: 25 or (10 which we get in U.S), julienned
Green chilly: 2, sliced
Red chilly powder: 2tbsp
Turmeric powder : 1/4 tsp
Vinegar : 3tbsp
Mustard seeds: 1tsp
Fenugreek seeds: 1/2tsp
Green chilly: 2, sliced
Red chilly powder: 2tbsp
Turmeric powder : 1/4 tsp
Asafoitida powder(kayam) : 1/4 tsp ++
Gingelly oil/Sesame oil : 2 tbsp + 2tbsp (i used olive oil)Vinegar : 3tbsp
Mustard seeds: 1tsp
Fenugreek seeds: 1/2tsp
Sugar: 1 tsp (optional)
Water : 1/2Cup
Salt
Water : 1/2Cup
Salt
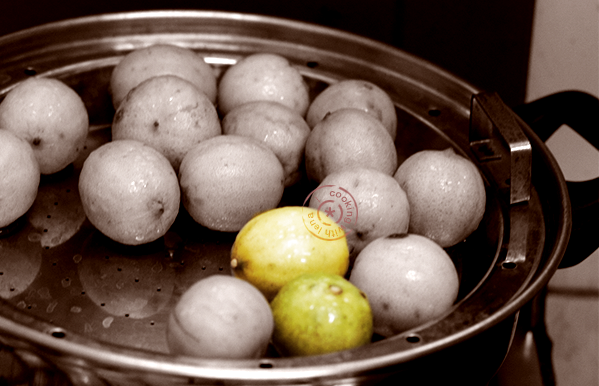
1. In a steamer / appa chembu, steam the lemons for 15minutes to make them soft. Check in between and turn off the flame before it breaks. Let it cool and wipe well with a kitchen towel.
2. Cut each lemon into 6 or 8 pieces and trasfer it into an airtight glass jar or ceramic bowl. Sprinkle 1tbsp of salt and sugar and mix well.
Note : 1. You can keep this for minimum 5days to maximum 2weeks. Just before making pickle you can take the lemon pieces from the jar and discard the juices from it. This step helps you to adjust the sourness of pickle. Now proceed with step 3.
2. If you are in a hurry to make pickle, make it after 3 days. then there wont be much liquid in the jar. so squeeze some juices from each slice and proceed.
2. If you are in a hurry to make pickle, make it after 3 days. then there wont be much liquid in the jar. so squeeze some juices from each slice and proceed.
3. Heat gingelly oil in a kadai and add mustard seeds. When it splutters, add fenugreek seeds. When it browns, add ginger garlic, curry leaves and green chillies. Add red chilly powder and turmeric powder. saute well.
4. Now turn the heat to low and add water. Mix well and allow it to boil for 5 minutes. Now it will be thick and you can turn off the flame and allow to cool.
5. Add the lemon pieces, vinegar, asafoetida powder and mix well. check the salt level and adjust at this point.
6. Keep it uncovered for 3-4 hours. Now transfer to an airtight jar and add the remaining 2tbsp of oil on top.
7. Serve with rice / curd rice / kanji.
Subscribe to:
Posts (Atom)









.jpg)


